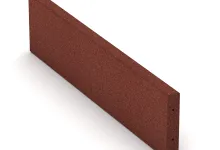
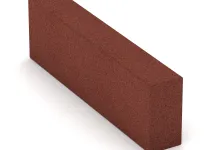
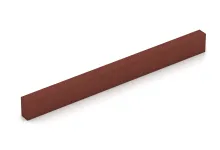
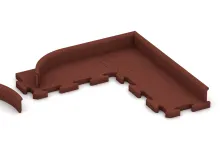
Wall protection tile FS "Brick red"
- /
-
Delivery in approx.
7-14 days - £28.80 / 4 Piece / m²
- (3.85 kg / Piece)
EAN: 4251469305274 | Item no.: 0527
The handy wall protection tile protects against damage that could occur at hitting or bumping against it. Typically, wall protection tiles hang on the walls or pillars in the car parks or garages at the height of the bumper of the car. However, also in the industry and trade, where hand carts and forklift trucks are driven, the wall protection tiles absorb the kinetic energy at bumping (also without paint damage) and dissipate it. That's why the wall protection tiles are profitable from the first bump on.
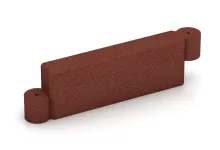
The effect of the carefree wall protection tile is based on the favourable interaction of the PU bound rubber granulate and the progressively damping mat profile. The wall protection tile is directly stuck on the protected surface or on a base plate (plywood, galvanised sheet metal, etc.). The base plate can be removably mounted on the wall by means of hidden hooks. The wall protection tile cannot be screwed on directly.


Discount
Product Highlights
Characteristics
Product Details – Material and Structure


Comparative values
To calculate how many tiles you need for your project, simply use the online installation planner available in the shop. This free browser-based tool is directly accessible on each product page – just below the price and quantity selection. Click on “Plan installation” to open the tool instantly – no registration or download required.
Enter the dimensions of your area, such as the length and width in metres. The planner will then automatically calculate the total number of tiles required, including a realistic allowance for offcuts. You’ll also be shown a suitable layout pattern for the selected product. The tool is user-friendly, accurate and ideal for planning your material requirements with confidence.
WARCO offers several connection systems for floor tiles, each differing in design, installation method and visual appearance. Below is an overview of the key differences:
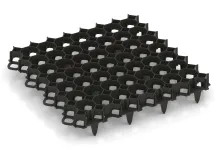
Puzzle joint (visible)
In this system, the tile edges feature an interlocking profile reminiscent of classic jigsaw teeth or mushroom-shaped connectors. During installation, the profiles of adjacent tiles interlock to form a continuous connection across the full tile thickness.
The joint profile may be formed directly during pressing or precisely cut after the tile has cured. Whether the joint is visible in the finished surface depends on the edge finish (e.g. with or without chamfer) and the surface colouration.
The symmetrical shape ensures uniform load transfer and makes this type of joint the most mechanically stable option.
Plug-in connectors (plastic dowels)
This system uses separate connecting elements, typically round plastic dowels, which are inserted into pre-drilled holes along the sides of the tiles. The tiles themselves have smooth, straight edges similar to precast concrete slabs.
Installation is carried out in a half-bond (stretcher bond) pattern: each tile is connected via dowels to two tiles in the row above and two in the row below. This prevents lateral shifting, although some movement along the length of the dowels remains possible. For this reason, an edge restraint must be installed around the perimeter to stabilise the entire area.
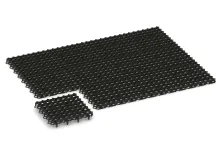
Concealed puzzle joint
This method is based on the same mechanical principle as the classic puzzle joint, but is designed to be invisible in the finished surface. The interlocking profile is located on the underside of the tile, integrated into a rebated step joint.
Two tile edges feature a positive locking profile, the other two a matching negative profile. When laid, the tiles interlock securely from below, forming a durable mechanical connection. From above, the surface appears seamless and aligned, typically with a clean, square joint pattern similar to a chessboard layout.