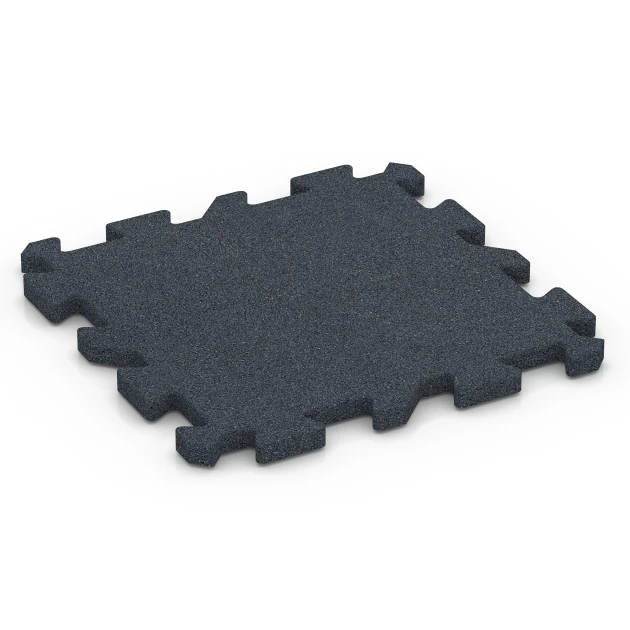
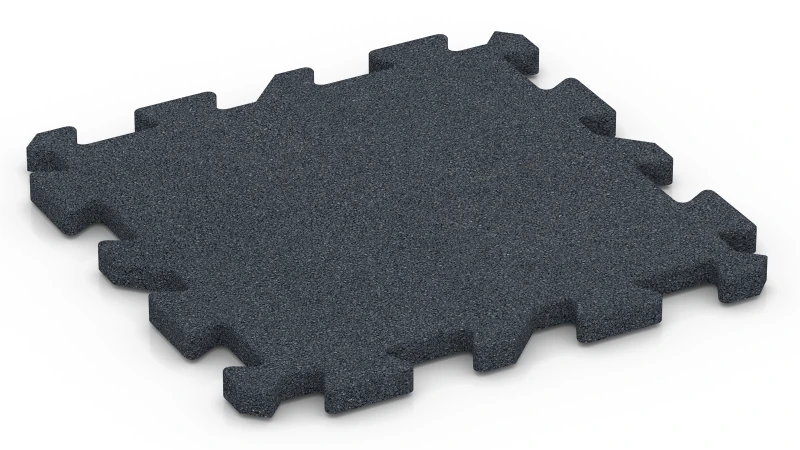
Dog kennel flooring UZ "Slate grey"
- /
-
Ready to ship
in approx. 2-3 weeks – production already under way - £44.40 / 4 Piece / m²
- (7.00 kg / Piece)
EAN: 4251469366190 | Item no.: 6619
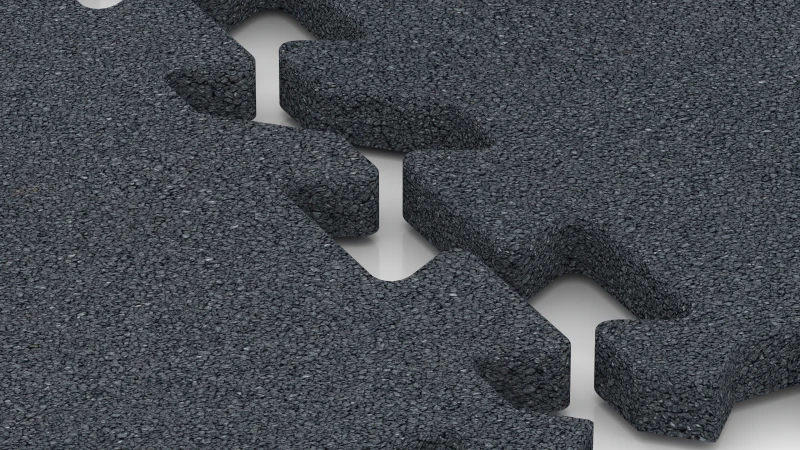
Dog kennel flooring Type UZ consists of tiles made from rubber granules bonded with polyurethane. They have a grippy, slip-resistant surface. A jigsaw interlock joins the tiles into a stable surface that needs no glue or edge restraint. The water-permeable flooring insulates against cold from the ground and is easy to keep clean throughout the year.
What does the flooring feel like for a dog?
A dog spends a lot of time in its kennel. It sleeps, dozes, waits for its family or rushes around when visitors arrive. On the grippy surface, paws and claws are less likely to slip when the dog springs up or turns. The resilient flooring cushions each step slightly and is kind to paws. When the dog lies down, it is not directly on the cold ground because the tiles provide insulation from the ground beneath. After rain, the surface dries quickly.
What are the kennel tiles made from?
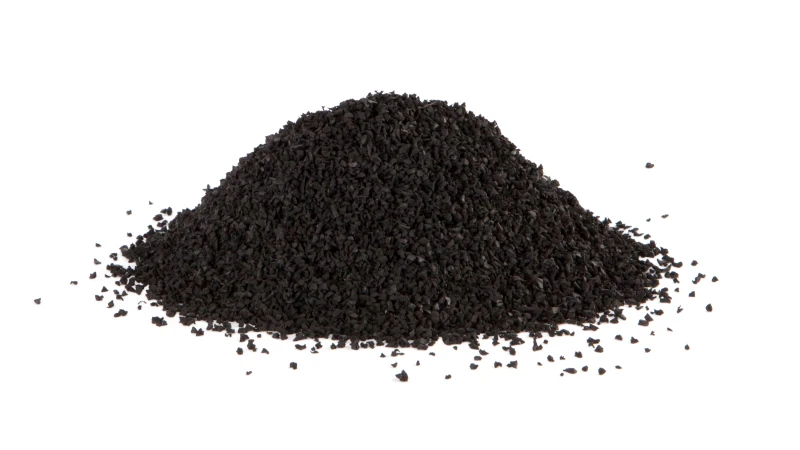
The tiles are made from recycled tyre rubber granules (ELT) bonded with polyurethane. The flooring does not rot or splinter. Because the tiles interlock, a dog cannot lift them or pull them out of place. New tiles may initially have a rubber smell. Outdoors, the smell fades after a short time.
How is the kennel flooring laid?
The tiles are simply laid down and joined using the jigsaw interlock. Glue, screws or edge restraint are not normally needed. Concrete, paving or asphalt provide suitable substrates. The substrate beneath the tiles must be stable, largely level and load-bearing over the long term. On grass, soil, gravel or chippings, gravel grids filled with chippings form the base. To ensure that each row ends in a straight edge, cut one tile in half for each row or remove a strip from its centre. Place the two halves as the first and last tile in the row, with the straight cut edges facing outwards. A circular saw works best. If the kennel is altered or extended, the tiles can be lifted without damage and relaid.
How does the flooring handle rain, urine and dirt?
Rain and urine pass through the tiles. On an impermeable substrate, water flows along the drainage channels on the underside and follows the gradient. On gravel grids, liquids soak away naturally into the ground. This prevents puddles and keeps the kennel from becoming muddy after rain. The tiles are frost-resistant and can remain in place over winter. Use a broom, garden hose or pressure washer to clean the tiles. Rinse urine away regularly with plenty of water to prevent lingering odours.
Where else can the kennel flooring be used?
Whether in a garden kennel, a boarding kennel bay or a pen at an animal shelter, the flooring is suitable for open and covered areas. Because each tile can be lifted separately, a worn or damaged tile can be replaced without relaying the whole surface.



Discount
Product Highlights
Characteristics
Product Details – Material and Structure

Comparative values
Rubber tiles and rubber mats from WARCO are not harmful to health when used as intended. They are made from rubber granules bound with PU; the solvent-free PU binder cures fully during manufacture.
The rubber granules are predominantly recycled from end-of-life tyres (ELTs). The PAH content of ELT rubber granules may vary according to origin and batch; PAH means polycyclic aromatic hydrocarbons. Black ELT rubber granules contain carbon black, a fine industrial soot that gives the rubber its black colour. Surface abrasion may occur during use of rubber mats.
In two-layer versions, the wearing layer is made from newly manufactured EPDM, which is coloured throughout and free from harmful substances. The possible PAH variations associated with ELT rubber granules do not occur with EPDM. Versions with an EPDM wearing layer are particularly suitable for prolonged or intensive skin contact and for areas intended for babies. The relevant product description states whether a product has a two-layer construction.
WARCO rubber tiles are made from rubber granules bound with polyurethane. Each granule is coated with polyurethane and held within the binder. The solvent-free binder cures fully during manufacture. Individual granules may remain attached to a tile after manufacture or come loose while the tiles are being laid. Any such manufacturing residue can be swept up or removed with a vacuum cleaner.
Vulcanised rubber and cured polyurethane are insoluble in water. Rainwater passing through the porous tiles does not dissolve these constituents. The same applies to individual granules left on the surface. On this basis, contamination of the soil or groundwater is not expected.
Outdoor rubber tiles made from polyurethane-bound rubber granules are frost-resistant and suitable for use throughout the winter. Their porous structure absorbs precipitation and allows it to pass downwards; water remaining in the pores has space to expand when it freezes, while the rubber granules and polyurethane binder remain elastic at sub-zero temperatures. The sub-base must also be constructed to withstand frost.
On bound sub-bases, water flows beneath and between the tiles in the direction of the fall towards the drainage system. On chippings or crushed stone, it drains vertically through the construction. If water collects beneath the tiles, a frost-susceptible sub-base may rise and then settle again after thawing. The tiles themselves remain unaffected, but the surface may become more uneven.
For winter maintenance, use a snow shovel with a smooth edge and avoid catching the tile edges. Salt used in normal quantities to melt ice does not harm the rubber granules.
WARCO rubber tiles and rubber mats made for outdoor use are weather-resistant and weatherproof. These floor coverings are made from rubber granules bound with a PU binder, so they do not rot or decay. These floor coverings are loose-laid, without adhesive or screws; this eliminates the risk of bond failure or delamination from the substrate, and installation does not damage the substrate.
The rubber tiles are porous and water-permeable: rainwater enters their structure and drains down through the tiles, rather than remaining on the surface. Beneath the tiles, water must be able to run off with the slope or drain directly into the substrate, allowing the surface to dry quickly. In frost, the rubber granules and PU binder remain elastic, while water in the pores has room to expand as it freezes. The tiles are therefore frost-resistant and do not crack or break in frost. Sun and weathering mainly affect the colour tone. UV stabilisation slows the effect of UV radiation on the rubber tiles, but it does not keep the colour tone permanently unchanged.
An EPDM wear layer is through-coloured, colour-stable and UV-resistant. With recycled tyre rubber granules (ELT) and a pigmented PU binder, the colour tone can change over the years. ELT rubber itself ages at the surface under intense sunlight. With changes in moisture and temperature, rubber tiles expand slightly and contract again.
Rubber tiles can be water-permeable at rates ranging from nearly zero to more than 1,100 litres per square metre per hour. Water permeability depends on the particle-size fraction of the rubber granules used and on the pressing pressure applied during manufacture. The tiles are made from PU-bound rubber granules and have an open-pored structure.
Within this porous structure, water does not pass through the rubber itself but through the voids between the bonded granules. The more tightly the granules are compacted, the less water a rubber tile allows through. At low pressing pressure, the irregularly shaped granules sit loosely beside one another, leaving interconnected pores and fine channels through which water flows vertically downwards. An accredited institute measured more than 1,100 litres per square metre per hour in accordance with BS EN 12616, even after four weeks of weathering.
The respective water permeability value is stated as a comparative value in the product description. Rubber tiles made under high pressing pressure have an almost void-free granule structure and allow hardly any water through. A newly laid area absorbs water more slowly during its first days than the measured value may suggest, because the granule surfaces initially resist wetting, much like a new rain jacket. After several days of use, the floor covering reaches its full water permeability; scrubbing it with a little washing-up liquid speeds up this process.
The test report can be submitted to building authorities as evidence of water permeability. How an area is classified depends on the overall system build-up: precipitation can drain through the floor covering into the ground only if the sub-base beneath the rubber tiles also absorbs water.
Installation of rubber tiles requires a load-bearing substrate designed to drain water. The tiles are water-permeable, so rainwater passing through them must infiltrate into the substrate or, alternatively, be discharged by a fall.
In central Europe, the suitable installation temperature is between 5 and 17 °C. Direct sunlight should be avoided, as it can cause tiles to heat up to differing degrees; throughout installation, all tiles should have an even temperature. Rain during installation does not harm the tiles, but soaked tiles must dry completely before installation.
General installation instructions must be followed, along with the requirements for the relevant product and installation system.
New rubber tiles may carry harmless release-agent residues from manufacture. Weathering washes these residues away; if required, they can be removed with water and a brush or with a pressure washer. The typical rubber smell of new tiles is harmless and reduces noticeably after a short time outdoors.
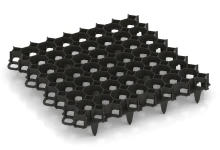
For most rubber tiles to stay level on stone chippings or gravel in the long term, the loose material must first be stabilised with plastic honeycomb grids. These are sold under various names, including gravel grids, grass grids and honeycomb gravel grids. In each case, the cells hold the chippings in place and stop them shifting.
Chippings are generally of a similar size, with no fine material to fill the gaps between them. They cannot therefore be compacted effectively and remain prone to movement. Walk across chippings or gravel and you can feel them shift underfoot and hear them crunch. Beneath a rigid concrete slab, that movement hardly matters. Beneath a rubber tile 2 to 5 cm thick, however, hollows develop in the bed and show through on the tile surface.
First, remove the topsoil and level the ground to the required formation level. Spread a thin layer of chippings over the prepared ground and screed it carefully to a flat finish. Lay the gravel grids on top and fill the cells flush with their upper edges. Use crushed chippings rather than rounded gravel, as their angular particles interlock much better. Then lay the rubber tiles on this bed. Where the ground has poor load-bearing capacity, or where the build-up needs to withstand frost, install and compact a sub-base beneath the laying course of chippings.
Certain WARCO ranges with a flat underside are approved for installation directly on a bed of chippings, without a gravel grid. These ranges always require a sub-base of compacted crushed stone (MOT Type 1). Over this, spread a 2 to 3 cm laying course of crushed sand and chippings graded 0/5, then screed it level and compact it with a plate compactor. Unlike chippings alone, this mix contains fine sand, which allows it to firm up.
The laying course must remain within that thickness range. Below 2 cm, it cannot be screeded and compacted properly; above 3 cm, too much loose material remains beneath the patio tiles. After compaction, check the surface with a three-metre straightedge: the gap beneath it should be no more than 0.5 cm anywhere.
Rubber flooring tiles can be installed directly over concrete, screed, asphalt or tiled floors as a loose-laid covering, without an additional sub-base.
With no additional sub-base required, the substrate must still be load-bearing, clean and sufficiently level. Remove loose material, oil and other contamination before laying. Larger irregularities, depressions and changes in level must be levelled out so that the tiles lie stably and do not create obtrusive edges.
The starting point and laying direction depend on the shape of the area and the required pattern. In many cases, starting in the centre helps to align the pattern evenly and produce similar cuts at opposite edges. For other areas, a straight boundary may provide the appropriate starting point.
Lay the tiles according to the chosen layout and join them firmly. Depending on the product, this is done using puzzle joints, dovetail joints or separate connectors. Measure the edge tiles, cut them to fit and then insert them.
Bonding is generally not required. Small cut pieces, stair treads and very small areas may require bonding.
The jigsaw interlock between rubber tiles is formed by alternating projections and matching recesses along each tile edge: the projections on one tile engage with the recesses in the adjoining tile, creating an edge profile similar to a jigsaw. Depending on the range, the projections are dovetail-shaped or rounded. In both cases, the head is wider than the neck, and the profile extends through the full tile thickness.
To lay the tiles, each tile is pressed down from above into the jigsaw interlock of the adjoining tiles already in place. The wider head prevents the tiles from being pulled apart across the surface; the interlock can be released only by lifting a tile vertically and holds the laid tiles together through their full thickness.
Where all four tile edges carry the same profile, the rubber tiles can be placed together from any side. Otherwise, the laying direction is specified by the profile. Bonding and perimeter edging are generally not required.
Grass and weeds can grow in the joints between rubber crumb tiles if the tiles are laid using plastic pins and the joints remain open down to the sub-base. The gaps can be closed during installation by bonding the edges of adjacent tiles together.
Even without bonding, weeds do not normally grow in the joints of tiles with a jigsaw interlock, whether visible or concealed, if the surface is used as intended and properly maintained. The joints are either too narrow for anything to grow in or do not reach the sub-base.
Whatever the joint type, keep the tiles and joints clean at all times to prevent unwanted growth from taking hold.
Algae and moss do not generally establish themselves on products made from rubber granules. Rubber provides no nutrients and offers no basis for roots to take hold.
If sand, potting compost or other organic debris accumulates on the surface, growth may develop in these deposits. To prevent this, products made from rubber granules should be cleaned regularly, as should other floor coverings.
Outdoor rubber tiles should be cleared of leaves, soil and sand regularly.
Loose dirt can be swept away with a rubber broom or rinsed off with a hose. Rain also washes much of the dust and pollen away through water-permeable tiles.
Regular maintenance reduces the work required for more thorough cleaning.
For thorough outdoor cleaning, a pressure washer is suitable. The water jet loosens dirt from the textured surface and removes more persistent residues such as dog mess or food residue.
Where clean water is not sufficient, use either a neutral cleaner suitable for rubber or a mildly acidic cleaner. A specialist rubber cleaner is not required. Biodegradable Sonett WC Cleaner Mint is particularly suitable and has a pH value of around 5 to 6.
Apply the cleaner evenly, either neat or slightly diluted. After 10 to 15 minutes, work it in with a brush, then rinse the area thoroughly with clean water.
When brushing, use moderate pressure only. Excessive pressure can loosen granules from the bonded matrix.
Strongly alkaline cleaners, abrasive products and solvent-based cleaning products are unsuitable, as they can attack the surface of the rubber tiles.